Alright, with you so far!
oh wow I'm really late, been working on one of the other projects. I know I'm slow... lol.. I'll try to catch up..

Dance Like No One is Watching...
Don't forget to Kiss a Frog Today!
1luckymama wrote: I have never printed a digi layout, shoul I use cardstock?
That's actually the next step!
BRB with the last digital steps.
On a molecular level, I'm very busy.
What kind of finish do you prefer for the photo paper, Tracy?
Do the same thing for your back cover.
Tile your windows again and drag and drop both the front and back cover to your new blank file.
You can now close the front and cover files. Your new blank file should look like this. Move the layers around to fit them inside the page if necessary. DO NOT RESIZE.
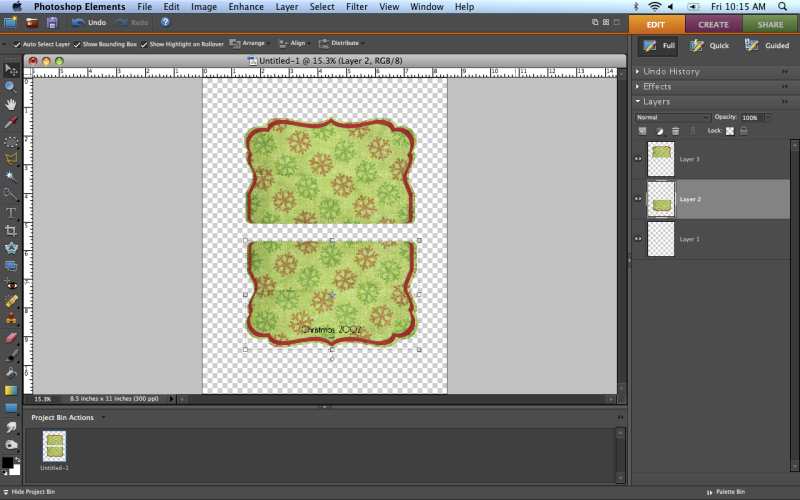
This is now ready to send to the printer. I have printed mine at home, which is one of the nice things about working with an album this size. I don’t need a wide format printer to do so. You can also send your pages to a photo processor if you so desire, just use an 8x10 size for your New Blank File instead of letter size. I used a Premium glossy photo paper for my pages.
Follow these steps for each set of pages in your album.
As an aside here, I did print test pages first. I sent them to my printer in draft mode. It gave me a feel for what the pages were going to look like finished, and I was able to see if things needed to be moved from where the album holes are. I also used them as a ‘planning page’ for how I wanted to lay out my traditional elements. This is totally optional.
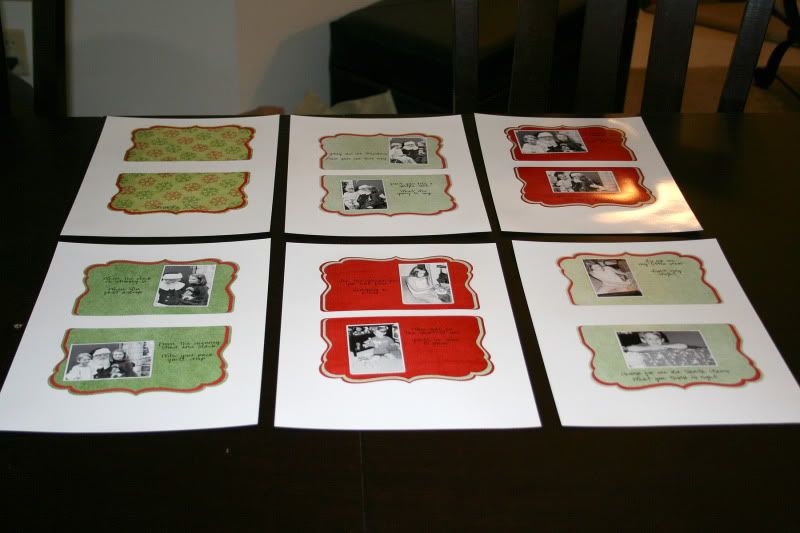
Here are my pages all printed.
You want to make sure the ink is fully dry before going on to the next steps. Follow your printer’s instructions on drying time. I let mine sit for 24 hours.
Once your pages are dry, you can carefully cut them out.
Tile your windows again and drag and drop both the front and back cover to your new blank file.
You can now close the front and cover files. Your new blank file should look like this. Move the layers around to fit them inside the page if necessary. DO NOT RESIZE.

This is now ready to send to the printer. I have printed mine at home, which is one of the nice things about working with an album this size. I don’t need a wide format printer to do so. You can also send your pages to a photo processor if you so desire, just use an 8x10 size for your New Blank File instead of letter size. I used a Premium glossy photo paper for my pages.
Follow these steps for each set of pages in your album.
As an aside here, I did print test pages first. I sent them to my printer in draft mode. It gave me a feel for what the pages were going to look like finished, and I was able to see if things needed to be moved from where the album holes are. I also used them as a ‘planning page’ for how I wanted to lay out my traditional elements. This is totally optional.
Here are my pages all printed.

You want to make sure the ink is fully dry before going on to the next steps. Follow your printer’s instructions on drying time. I let mine sit for 24 hours.
Once your pages are dry, you can carefully cut them out.
On a molecular level, I'm very busy.
averys_mom wrote: What kind of finish do you prefer for the photo paper, Tracy?
I prefer matte myself but I can't seem to find it at the stores anymore.
On a molecular level, I'm very busy.
good suggestion to see where the holes would be first. I would have probably just printed them.
Molly
Like I would be able to finish anything tonight 
Michelle


Fantastic!! This is going to be so cute. I'm so excited!
We’re ready to start adhering our pages to the album. Get your album and remove the rings. Stack your pages in order in one pile, your album pages in another. You will need Mod Podge, an applicator, a brayer, and a clean working surface and hands here.
I'm going to tell you that for the COVER PAGE ONLY, you may want to line up the page and mark the holes and punch them BEFORE adhering it. This is because the cover has eyelets and it was a total PAIN to get my page to adhere flat.
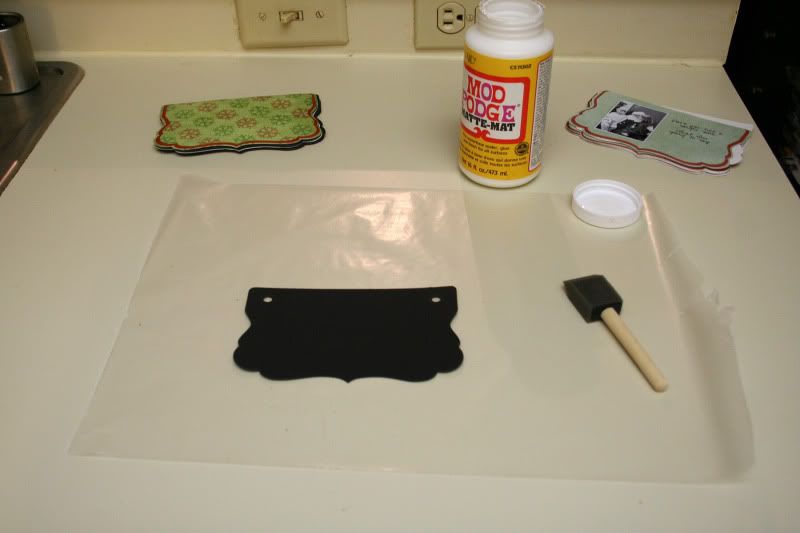
I'm going to tell you that for the COVER PAGE ONLY, you may want to line up the page and mark the holes and punch them BEFORE adhering it. This is because the cover has eyelets and it was a total PAIN to get my page to adhere flat.

On a molecular level, I'm very busy.
i'm just taking notes... this is so cute...
ShanShan


Yay! Just printed my front & back covers- they look great!
Side note: I am told that if you have a Xyron Cheeta that it will adhere your pages as good as or better than the Mod Podge. I do own one, but I didn’t have enough adhesive to complete the album, hence the Mod Podge. If you have one and want to use that to adhere your pages, you can do so.
Starting with the cover (and NO my pic below is not of my cover, LOL), apply a thin layer of Mod Podge to the album and place your page over it, centering as best you can. You will have overlap on the edges. That is perfectly ok as we will be trimming them later. Well YOU will---I totally forgot!
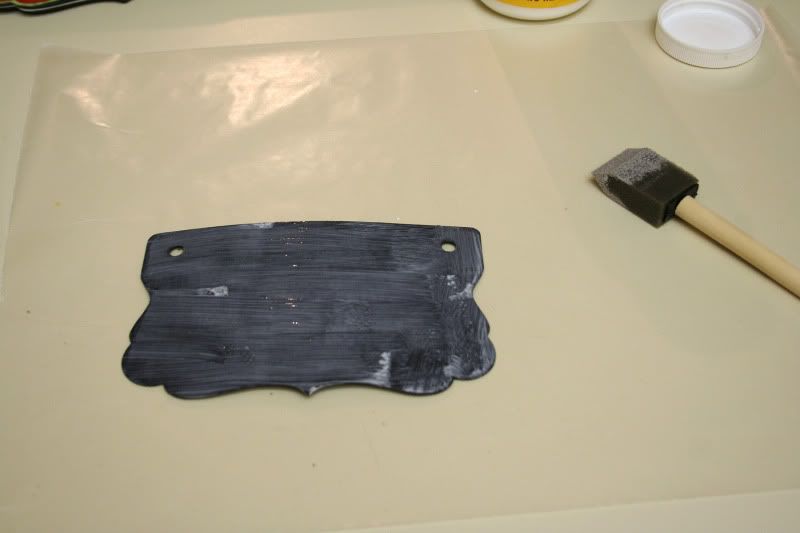
Starting with the cover (and NO my pic below is not of my cover, LOL), apply a thin layer of Mod Podge to the album and place your page over it, centering as best you can. You will have overlap on the edges. That is perfectly ok as we will be trimming them later. Well YOU will---I totally forgot!

On a molecular level, I'm very busy.
i'll have to come back and check this out - wathcing the grandbaby.

SarahA wrote: Yay! Just printed my front & back covers- they look great!
GO you!!! Now listen--it's important. DON'T try to cut out or Mod Podge those tonight! The ink is not set and you will get smudges. Wait until tomorrow. Pinkie swear?
On a molecular level, I'm very busy.
This class is great! I wasn't sure what Hybrid was and it was kind of intimidating but seeing the printouts that you printed, it doesn't look too hard. 
Michelle


