

I thought it would be fun to make a little something to include with cards or gifts for Mother's Day - or just a little gift for someone - or for yourself. I have gotten these instructions from the internet from the following ladies. I did not post their photos (technical glitch on my part), but I included the samples that I made. =10ptIt took me around an hour or less to make each of these. There are 4 of them, but you only have to make 1 for this Fast Scrap. ,I hope you have fun with this - I did.
1) Photo of your project must be posted here by the end of this hour (4:05 pm eastern time).
4) Must follow all other ACOT NSD rules. ,No combining, etc.
5) Points will be awarded to random entrants. ,(I'll number the entrants and pick numbers with random.org) One winner per seven entrants!
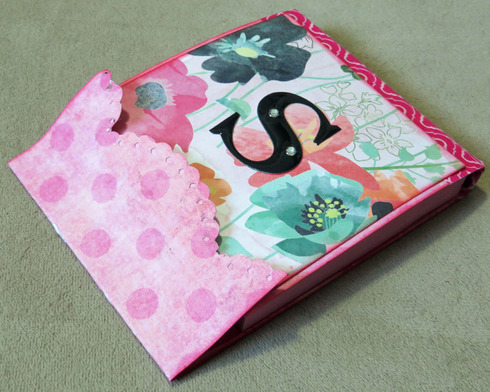
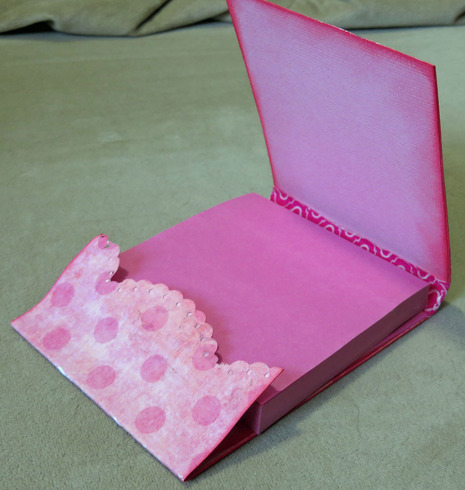
1) Post It Note Matchbook Covers by Sandy Mathis
at StampwithSandy@aol.com
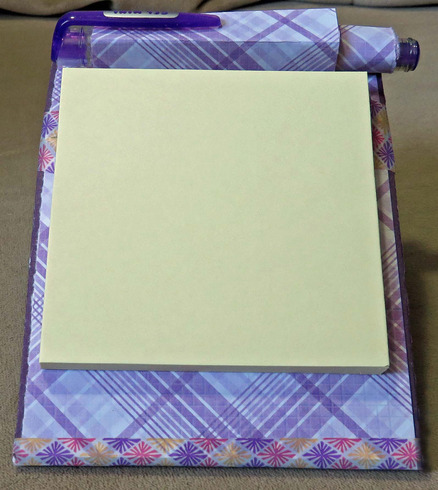
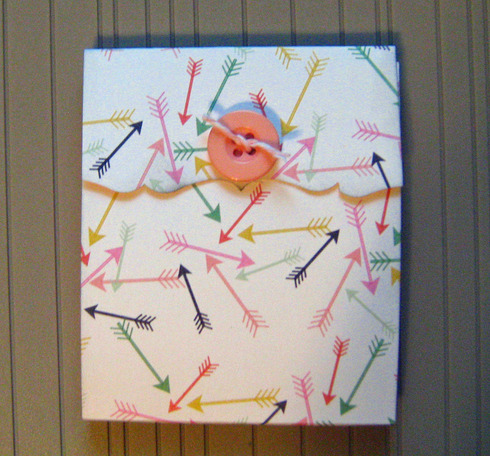
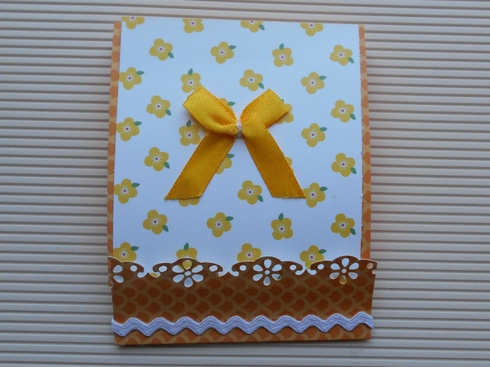
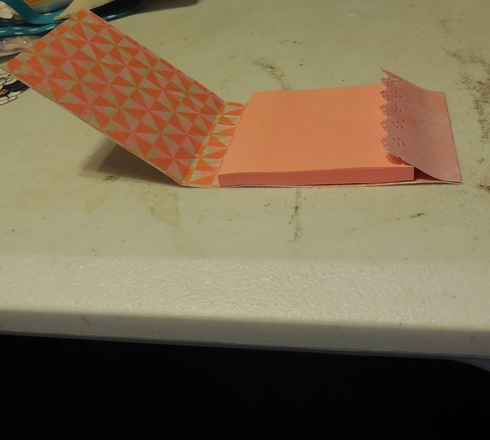
I made these Post It Note Matchbook Covers for my New Catalog Launch and Customer Appreciation Day earlier this week. I was so pleased that everyone loved them! They are super simple to do, also. You need to start with a piece of card stock 9 1/4" x 3 1/8". Using your Simply Scored, score at 3 3/8", 3 3/4", and 7 3/4". Punch the shortest edge closest to the 7 3/4" score line with whatever border you have. Crease the score lines with a bone folder. Decorate the covers as you like. Use Sticky Strip to hold down the flap at the bottom, and to attach the stack of Post It Notes inside. That's all there is to it! It holds a 3" x 3" stack of Post it Notes.
My examples:
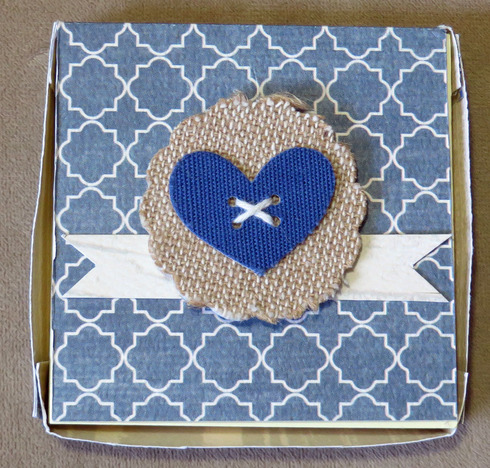
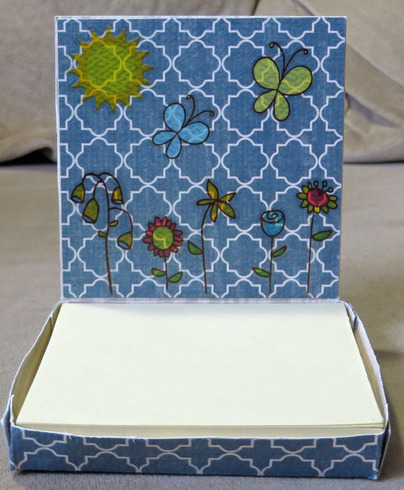
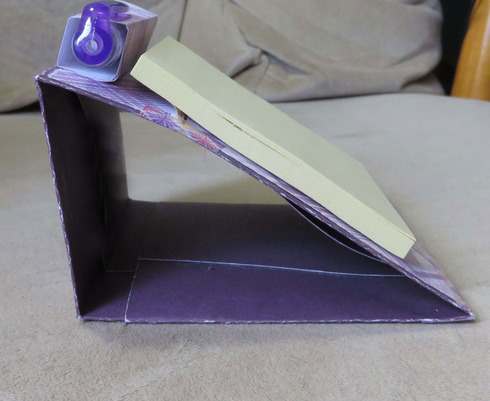
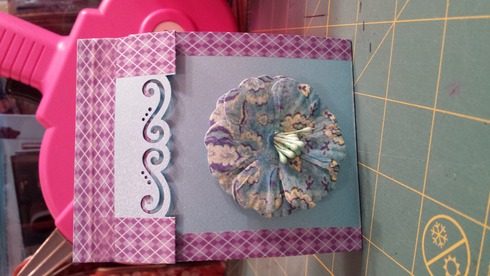
2) Post it Note Holder with tutorial
by Karen at studioatthelake.blogspot
Start with a piece of sturdy card stock, 120# would be ideal.
1. Cut cs 7" x 4".
2. With the 4" side on your left, using a Scor-Pal, score at 1/2", 3.5" and 4".
3. Rotate cs, placing the 7" side on the left and score at 1/2" and 3.5".
4. Make cuts, including punch out where noted.
5. Fold along score lines, place Scor tape on flaps and create the box.
Decorate as desired.
My examples:
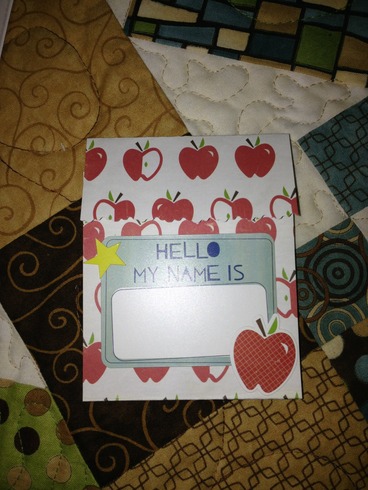
3) Post it holder Tutorial by Jenna
at jennasinklink.blogspot.com
I am SO excited to share this tutorial with you! This is my very first tutorial. I will be showing you how to make a post it note holder that would be great for your desk or a wonderful gift for those business savvy fathers, mothers or teachers in your life!!! I do hope that I have made this tutorial simple and to the point! Any feedback would be greatly appreciated and I would LOVE to see what some of you come up with using this tutorial so leave a comment with a link to your creation!! Here I go!
Supplies:
-81/5 x 11 sheet of cardstock (I am using Sahara Sand)
-Your favorite DSP(designer series paper) (I used To the Nines) cut at 3 3/8 x 4 3/8 (Front, under Post it holder) & 3 1/5 x 2 1/5 (Pen Holder)
-If you'd like to cover you pen you'll need a piece for that and you'll have to measure it out as pen sizes vary!
-Tombow Glue
-Bone Folder
-Craft Knife and Ruler or paper trimmer
-A Pen and Post-it Notes
[img]file:///C:/Users/Sandy/AppData/Local/Temp/msohtmlclip1/01/clip_image011.jpg[/img]
Start by scoring the short side of your 8 1/2 x 11 sheet of paper at 2 1/2" and at 6".
I marked my score lines in black so they would be easy to see!
[img]file:///C:/Users/Sandy/AppData/Local/Temp/msohtmlclip1/01/clip_image012.jpg[/img]
Turn your paper and Score again at 3 1/4", 7 3/4" and 10"
[img]file:///C:/Users/Sandy/AppData/Local/Temp/msohtmlclip1/01/clip_image013.jpg[/img]
Glue your 3 3/8 x 4 3/8 sheet of DSP in the middle box, it should fit just inside the score lines.
[img]file:///C:/Users/Sandy/AppData/Local/Temp/msohtmlclip1/01/clip_image014.jpg[/img]
On the opposite side, you will be cutting a 3 1/8" long line 1" down from the score line.
Make sure your paper is as shown with the 1" score line as the top of your paper!
[img]file:///C:/Users/Sandy/AppData/Local/Temp/msohtmlclip1/01/clip_image015.jpg[/img]
Using a ruler or a paper trimmer cut your 3 1/8" line. It should be about a 1/4" from each sides score line.
[img]file:///C:/Users/Sandy/AppData/Local/Temp/msohtmlclip1/01/clip_image016.jpg[/img]
Slip the back of your Post it notes into the cut on the side with the DSP.
[img]file:///C:/Users/Sandy/AppData/Local/Temp/msohtmlclip1/01/clip_image017.jpg[/img]
Turn your paper over and fold all of the creases using your bone folder.
[img]file:///C:/Users/Sandy/AppData/Local/Temp/msohtmlclip1/01/clip_image018.jpg[/img]
It should now look like this, now fold the other score lines towards the back of the post it notes.
[img]file:///C:/Users/Sandy/AppData/Local/Temp/msohtmlclip1/01/clip_image019.jpg[/img]
Slip the long end into the opening on the short end. Turn over and voila post it holder! Now to add the pen holder on the top!
[img]file:///C:/Users/Sandy/AppData/Local/Temp/msohtmlclip1/01/clip_image020.jpg[/img]
Score your the short side of your 3 1/2 x 2 1/2 piece of DSP every 1/2" or at 1/2", 1", 1 1/2", 2".
Go over creases with your bone folder.
[img]file:///C:/Users/Sandy/AppData/Local/Temp/msohtmlclip1/01/clip_image021.jpg[/img]
put a little bit of Tombow Glue on one end and adhere to make a square as shown below.
[img]file:///C:/Users/Sandy/AppData/Local/Temp/msohtmlclip1/01/clip_image022.jpg[/img]
This should be how yours looks, now put a little bit of Tombow Glue on the side with the fold and adhere to the top of the holder.
[img]file:///C:/Users/Sandy/AppData/Local/Temp/msohtmlclip1/01/clip_image023.jpg[/img]
[img]file:///C:/Users/Sandy/AppData/Local/Temp/msohtmlclip1/01/clip_image024.jpg[/img]Wrap pen in DSP, embellish a little and your done! Easy, cute and usable!!
My examples:
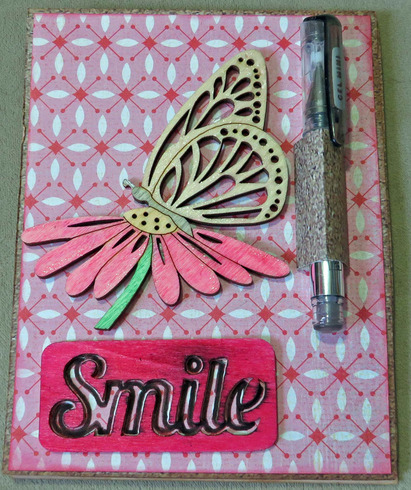
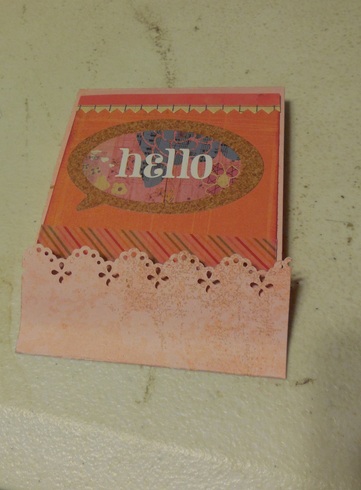
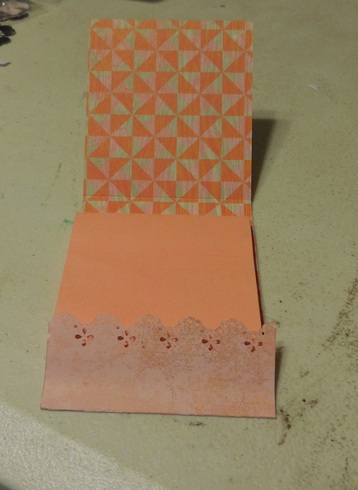
4) Valentine 3"x3" Post-it Note Cover {instructions} by Vicki Wizniuk
at wizardshangout.blogspot.com
[img]file:///C:/Users/Sandy/AppData/Local/Temp/msohtmlclip1/01/clip_image026.jpg[/img]First, start with a piece of cardstock cut to 3 1/4" x 12".
Then score your cardstock at 3 7/8", 4 1/4", 6 1/4", and 8 1/8".
The only tricky part is making sure that you glue the correct section together.
If you need more visuals, you can check out the instructions by Susan Itell below, where she explains in photos how to make these for 1 1/2" x 2" sized Post-it Notes.
- The base strip is 2 1/4" X 8 1/2" and then score at 2 5/8", 3 1/8", 4 5/8", 6"
My examples:


![[img]file:///C:/Users/Sandy/AppData/Local/Temp/msohtmlclip1/01/clip_image011.jpg[/img]](http://4.bp.blogspot.com/_jc5WgDwYqso/SftSJ--PrhI/AAAAAAAAAH0/e51-5D8X1TA/s1600-h/DSC_0007.JPG)
![[img]file:///C:/Users/Sandy/AppData/Local/Temp/msohtmlclip1/01/clip_image012.jpg[/img]](http://2.bp.blogspot.com/_jc5WgDwYqso/SftU5wep7HI/AAAAAAAAAH8/dytdJcLI6gY/s1600-h/DSC_0010.JPG)
![[img]file:///C:/Users/Sandy/AppData/Local/Temp/msohtmlclip1/01/clip_image015.jpg[/img]](http://3.bp.blogspot.com/_jc5WgDwYqso/SftWZx_aGJI/AAAAAAAAAIE/1ZEObosvYlw/s1600-h/DSC_0015.JPG)
![[img]file:///C:/Users/Sandy/AppData/Local/Temp/msohtmlclip1/01/clip_image016.jpg[/img]](http://4.bp.blogspot.com/_jc5WgDwYqso/SftXQSCtkCI/AAAAAAAAAIU/EcZIwopzOeY/s1600-h/DSC_0021.JPG)
![[img]file:///C:/Users/Sandy/AppData/Local/Temp/msohtmlclip1/01/clip_image017.jpg[/img]](http://1.bp.blogspot.com/_jc5WgDwYqso/SftXQIfrSLI/AAAAAAAAAIM/LD-VPyy3toY/s1600-h/DSC_0018.JPG)
![[img]file:///C:/Users/Sandy/AppData/Local/Temp/msohtmlclip1/01/clip_image018.jpg[/img]](http://1.bp.blogspot.com/_jc5WgDwYqso/SftXQnbhA0I/AAAAAAAAAIc/qT7Va4qpuIY/s1600-h/DSC_0022.JPG)
![[img]file:///C:/Users/Sandy/AppData/Local/Temp/msohtmlclip1/01/clip_image019.jpg[/img]](http://1.bp.blogspot.com/_jc5WgDwYqso/SftYxZXiziI/AAAAAAAAAI0/huioRNKYYQA/s1600-h/DSC_0026.JPG)
![[img]file:///C:/Users/Sandy/AppData/Local/Temp/msohtmlclip1/01/clip_image020.jpg[/img]](http://2.bp.blogspot.com/_jc5WgDwYqso/SftXRAaQCyI/AAAAAAAAAIs/Mk5cRG4FF94/s1600-h/DSC_0028.JPG)
![[img]file:///C:/Users/Sandy/AppData/Local/Temp/msohtmlclip1/01/clip_image021.jpg[/img]](http://3.bp.blogspot.com/_jc5WgDwYqso/SftYxuXjS3I/AAAAAAAAAI8/AJAHyzHiXHc/s1600-h/DSC_0029.JPG)
![[img]file:///C:/Users/Sandy/AppData/Local/Temp/msohtmlclip1/01/clip_image022.jpg[/img]](http://2.bp.blogspot.com/_jc5WgDwYqso/SftYx8d59TI/AAAAAAAAAJE/nvvif6QdwXA/s1600-h/DSC_0031.JPG)
![[img]file:///C:/Users/Sandy/AppData/Local/Temp/msohtmlclip1/01/clip_image023.jpg[/img]](http://3.bp.blogspot.com/_jc5WgDwYqso/SftaZUq0CwI/AAAAAAAAAJM/tL3XYntkxWY/s1600-h/DSC_0033.JPG)
![[img]file:///C:/Users/Sandy/AppData/Local/Temp/msohtmlclip1/01/clip_image024.jpg[/img]](http://1.bp.blogspot.com/_jc5WgDwYqso/SftaZ2-8nSI/AAAAAAAAAJU/02Lon8SCeRM/s1600-h/DSC_0034.JPG)
![[img]file:///C:/Users/Sandy/AppData/Local/Temp/msohtmlclip1/01/clip_image026.jpg[/img]](http://3.bp.blogspot.com/-2t9nRWTV6lM/UtVePnJUyMI/AAAAAAAAHHE/MS4gdzK1yvA/s1600/Valentine+3x3+Post-it+Cover+Open+-+Vicki+Wizniuk.JPG)
![[img]file:///C:/Users/Sandy/AppData/Local/Temp/msohtmlclip1/01/clip_image038.gif[/img]](http://featherfiles.aviary.com/2013-09-15/f77694d11/2d268a3606754b76a643ec0911c564c2_hires.png)