Trifold Card Trifecta Class meeting here!
Posted: Sat Feb 27, 2010 9:01 am
Good morning Good morning, glad to see all of you here for the Trifecta card class. I will post each card directions separately and edit the post later so they are all in one place.
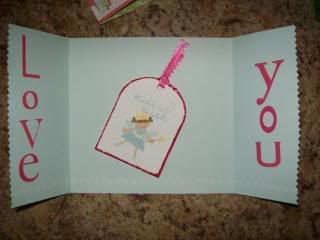
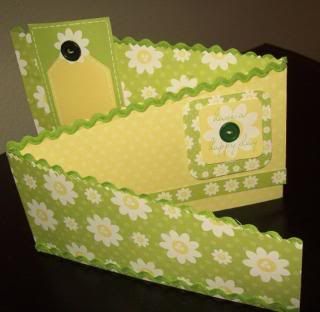
Please sign in and we'll get started Scroll to the end of Card No. One to see the completed card, thanks.
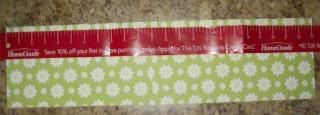
CARD NUMBER ONE: one sheet of 12x12 double sided paper or two complimentary patterned papers adhered together.
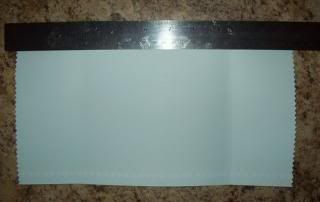
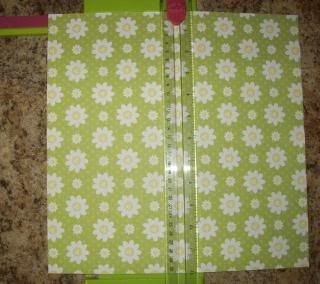
STEP ONE: cut a piece the piece of 12x12 in half making sure the pattern (stripes or flowers for example) runs across the 12 inch side.
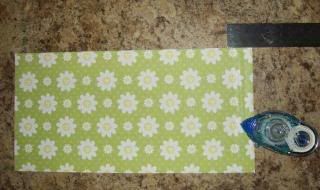
STEP TWO: over lap the two 6x12 pieces by one inch and adhere.
STEP THREE: On the left side of the two adhered strips, make a mark approximately 2 inches from the bottom of the paper
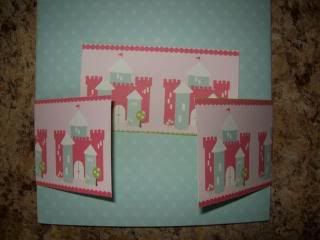
STEP FOUR: Using a yard stick or a regular ruler (or even two end to end), draw a line from the top of the right hand side down to the 2 inch mark on the left end. (some options: use a curvy or wavely ruler to create your line, cut the straight line with deco scissors like I did or use a border punch on the cut line when you are done). Cut the line.
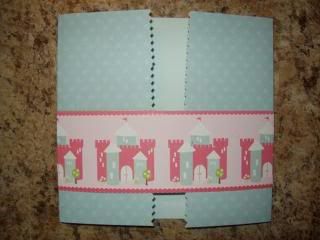
Step Five: With a scoring blade in your cutter, score the card every 8 inches starting on the left side. Fold into three sections . (options: if you do not have a scoring blade or a Score It, insert the paper into your cutter and, using a pointed but not sharp object run it down the cutter between the guides. I find the cap to a Bic pen quite effective).

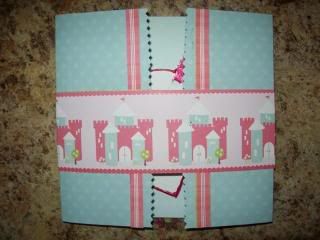
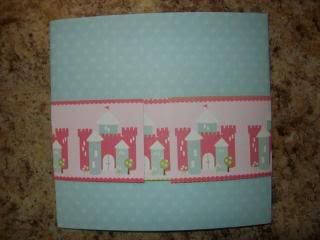
Step Six: Embellish to taste
Please sign in and we'll get started Scroll to the end of Card No. One to see the completed card, thanks.
CARD NUMBER ONE: one sheet of 12x12 double sided paper or two complimentary patterned papers adhered together.
STEP ONE: cut a piece the piece of 12x12 in half making sure the pattern (stripes or flowers for example) runs across the 12 inch side.
STEP TWO: over lap the two 6x12 pieces by one inch and adhere.
STEP THREE: On the left side of the two adhered strips, make a mark approximately 2 inches from the bottom of the paper
STEP FOUR: Using a yard stick or a regular ruler (or even two end to end), draw a line from the top of the right hand side down to the 2 inch mark on the left end. (some options: use a curvy or wavely ruler to create your line, cut the straight line with deco scissors like I did or use a border punch on the cut line when you are done). Cut the line.
Step Five: With a scoring blade in your cutter, score the card every 8 inches starting on the left side. Fold into three sections . (options: if you do not have a scoring blade or a Score It, insert the paper into your cutter and, using a pointed but not sharp object run it down the cutter between the guides. I find the cap to a Bic pen quite effective).
Step Six: Embellish to taste