Page 1 of 3
Wooden Block Class Here
Posted: Fri Aug 28, 2009 9:06 pm
by mkcdaisy
Hello Ladies
So my class will be right here tonight. My intention was to do the larger paper one and a smaller digi one. Well I LOVE the larger one with the new Bo Bunny Christmas stuff. The digi one didn't come out of my head right so I have it started with the printouts on it but its lacking embellishment.
I will start with the larger paper supply one and give you directions. I will also be showing you some embellishment ideas along the way.
So lets get started
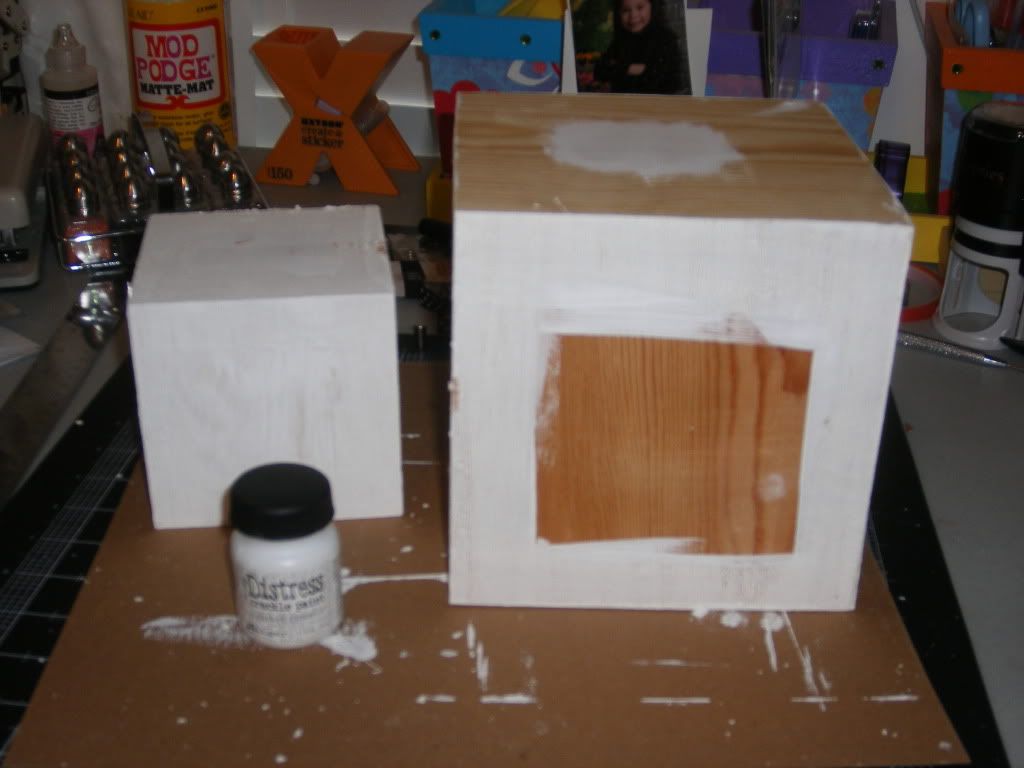
I am using a 5 3/4" wooden block from Michael's (I'm honestly not sure they still have them - at least ours doesn't). You have a few options here:
Paint it
Crackle Paint it

Stain it
Pretty much anything you can do with wood
I chose to Crackle Paint mine and started with a basic white acrylic paint base coat. You don't have to worry about the middle of the side since they will be covered. After you let the base coat try (you don't have to do this step) you can apply the crackle paint

Follow the directions on the bottle. How thick you put on the paint will determine how defined the cracks are.
Re: Wooden Block Glass Here
Posted: Fri Aug 28, 2009 9:08 pm
by writerlady
Oh - I didn't get crackle paint. Is acrylic paint ok? I can't do this tonight - but I have all the stuff and I'm going to make it tomorrow! I love this class!!!!
Re: Wooden Block Glass Here
Posted: Fri Aug 28, 2009 9:09 pm
by mkcdaisy
yes you can just use regular acrylic paint and leave it like it is or distress it with sandpaper. The crackle paint was a last minute decision but anyway is fine
Re: Wooden Block Glass Here
Posted: Fri Aug 28, 2009 9:13 pm
by craftyfool
I'm finally getting dinner so I'm just gonna watch. But I have all the stuff so I'll do it later.
And I have crackle paint!

Re: Wooden Block Glass Here
Posted: Fri Aug 28, 2009 9:14 pm
by writerlady
darn it - can I come over and use yours?
Re: Wooden Block Glass Here
Posted: Fri Aug 28, 2009 9:14 pm
by 1luckymama
Cool project! But, off the subject, what is that in the background that looks like several little salt shakers??
Re: Wooden Block Glass Here
Posted: Fri Aug 28, 2009 9:15 pm
by writerlady
and I'd like to know where you got an orange xyron? Mine is purple (I think)
Re: Wooden Block Glass Here
Posted: Fri Aug 28, 2009 9:16 pm
by mkcdaisy
ok i don't know how many ladies are joining us so I am gonna go ahead and they can catch up
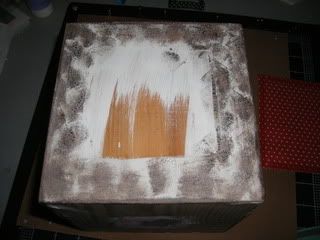
The next step is optional but when I use crackle paint I love to ink it. I used the Walnut Stain Distress Ink by Ranger

I used a triangle makeup sponge to apply it and its your choice if you do a heavier coverage or a lighter one.
One this is done you will need to put a protective coat on it, this will keep you from getting really messy. I chose to use a spray one so that it didn't smear with a brush.

Re: Wooden Block Class Here
Posted: Fri Aug 28, 2009 9:17 pm
by dianagirly
I'm here to Amanda!
Re: Wooden Block Glass Here
Posted: Fri Aug 28, 2009 9:17 pm
by letumom
writerlady wrote:and I'd like to know where you got an orange xyron? Mine is purple (I think)
Mine is pink!
Re: Wooden Block Glass Here
Posted: Fri Aug 28, 2009 9:18 pm
by craftyfool
writerlady wrote:darn it - can I come over and use yours?
Yep! I share well.

(But all I have is pink...)
Re: Wooden Block Class Here
Posted: Fri Aug 28, 2009 9:19 pm
by letumom
I bought the blocks, but I'm going to have to watch. Didn't get the paint. Dang!
Re: Wooden Block Class Here
Posted: Fri Aug 28, 2009 9:20 pm
by mkcdaisy
stacy - it is salt and pepper shakers - the mini ones. Its a set of 24 i found at target for like $11 and they have glitter in them. Came with the holder - I will take a pic for you
Sandy, its an older Xyron and at that time they were all orange.
Re: Wooden Block Class Here
Posted: Fri Aug 28, 2009 9:22 pm
by writerlady
I like pink!!!
Re: Wooden Block Class Here
Posted: Fri Aug 28, 2009 9:24 pm
by jazzyscrapper
I forgot to buy the blocks last weekend during my errands so will just watch tonight.
Re: Wooden Block Glass Here
Posted: Fri Aug 28, 2009 9:25 pm
by Heidi1154
I finally had my dh go to the lumber place and get me 4" blocks cut.
LOL
That was after 2 days of running from store to store to look for them.
All is good!
Re: Wooden Block Class Here
Posted: Fri Aug 28, 2009 9:26 pm
by 1luckymama
mkcdaisy wrote:stacy - it is salt and pepper shakers - the mini ones. Its a set of 24 i found at target for like $11 and they have glitter in them. Came with the holder - I will take a pic for you
Sandy, its an older Xyron and at that time they were all orange.
Thanks! That is an awesome idea!
Re: Wooden Block Class Here
Posted: Fri Aug 28, 2009 9:27 pm
by mkcdaisy
i didn't think to tell you guys about the paint so thats my fault.
Ok so after you have done this and sprayed it you want to cut your paper - do this while your sealer dries

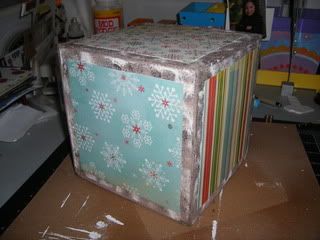
The block I used is 5 3/4" so I cut the papers to 5". If you want less of the block to show, cut them smaller. At this point its all a matter of how you want your block to look.

Papers - all bo bunny - tis the season collection


You could also cut the papers to brackets, scalloped edges etc... Also inking the edges of them always looks great.
To adhere the paper to the blocks I used the red Terrifically Tacky tape. All around the edges of the paper and then double stick tape in the middle just to help. I use to use mod podge for this and the only problem I had there was sometimes it would bubble or wrinkle even use small amount.
Re: Wooden Block Class Here
Posted: Fri Aug 28, 2009 9:30 pm
by craftyfool
Who makes Terrifically Tacky tape? I am not sure I've seen it.
Re: Wooden Block Class Here
Posted: Fri Aug 28, 2009 9:33 pm
by mkcdaisy
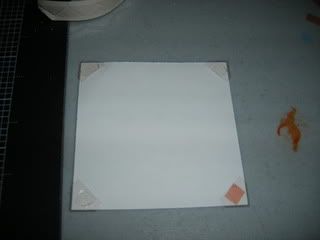
Now I always put pictures on - or at least a place for them before I start embellishing. The reason I told you to get the clear photo corners is this way if you choose to change the pics out from year to year you have that option. If not you can adhere them down.
I cut paper scraps out to size for the photos for the matter or showing you. Place a photo corner on each corner of the pics. On the back of the corner, I also placed a small piece of the red tacky tape so it has a stronger hold.

The next thing I will show you is some of the embellishments I made for my block. Be right back with that.


