
and I was inspired by this on pinterest!

here ar ethe directions I followed...
http://www.themotherhuddle.com/tutorial ... red-bench/
except I bought my sheling at Home Depot and it is probably twice as long as this one....
I also had to go in each corner for the legs about 3 1/2 inches since my legs were fairly big....{it will be trial and error depending on the legs you buy}
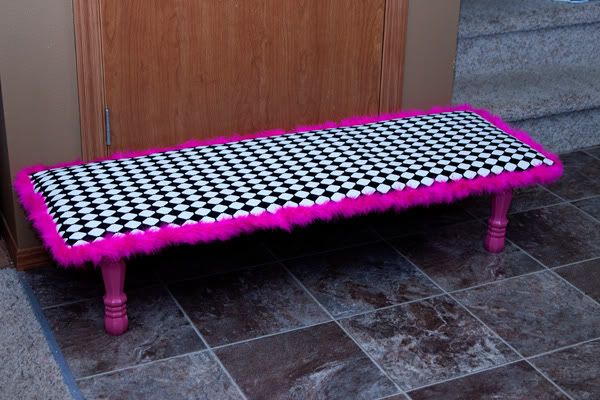
I spray painted the legs with a couple of coats of hot pink spray paint
BE PATIENT with the liguid nails!!!!! it takes FORVER to dry.....{instead of using the ring threads that she used inside the holes of the bench, I decided to make it easy and fill the holes with LIQUID NAILS and then just PLACE the legs inside it and put lots of liquid nails areound the edge of the leg....where it meets the shelf......}
I had to leave mine upside down in my garage for about 2 days to be COMPLETELY dry......
then I spary painted the legs again....don't worry cause you won't see the bottom of the bench anyway!
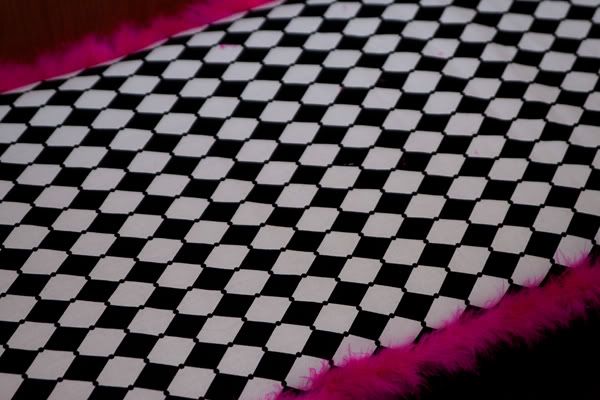
then I just followed her directions for the batting and fabric and stapled away!!!
I decided to add the pink fuzzy around it to give it a little bit of "Paris" flair since this is what Abby's room looks like


 ~Angie~


 WAS a TIKI BAR GIRL AND ALWAYS WILL BE


